
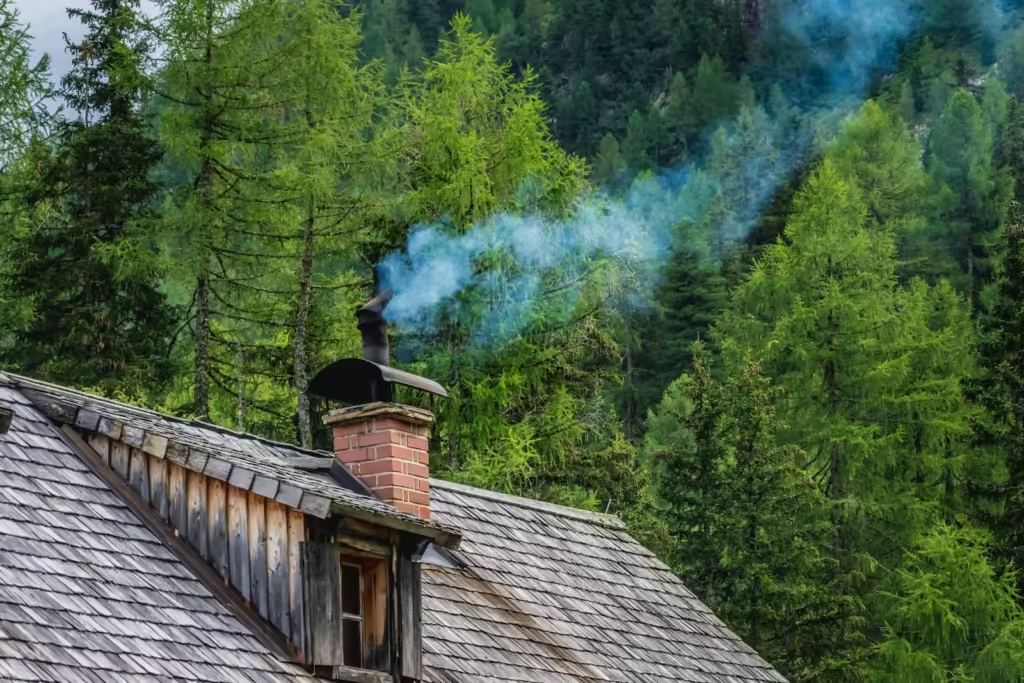
A well-maintained brick chimney is crucial for the safety and efficiency of your home. Not only does regular chimney maintenance protect your home from smoke, heat, and fire hazards, but it can also save you money in the long run by preventing costly repairs and replacements. In this comprehensive guide, we will explore the importance of maintaining a brick chimney, the steps you can take to ensure maximum efficiency, and additional tips for keeping your chimney in top condition.
Why Maintaining a Brick Chimney is Important
Enhancing Heating System Efficiency
A brick chimney serves as an integral part of your home’s heating system. Regular maintenance ensures that the flue liner and the exterior masonry remain clear of soot and debris. This cleanliness allows heat to travel efficiently up the chimney, preventing blockages and enhancing your fireplace or heating system’s performance. Additionally, a well-maintained chimney can provide an extra source of draft, further improving efficiency.
Providing Protection for Your Home
Brick chimneys offer an additional layer of protection for your home’s interior. The durable brick material acts as a barrier against wind, rain, and snow, keeping these elements out of your home. Moreover, bricks provide insulation, helping to maintain a comfortable temperature indoors, especially during colder months.
Reducing the Risk of Chimney Fires
Chimney fires pose a significant risk to your home’s safety and can cause extensive damage. Regular inspection and cleaning of the chimney can remove creosote and other combustible particles before they accumulate and pose a fire hazard. Preventing the buildup of these substances is essential in reducing the risk of chimney fires.
Preserving Masonry
Brick, although strong, can deteriorate over time if not properly maintained. Sealing and inspecting mortar joints regularly can prolong the masonry’s structural integrity and reduce the need for frequent replacements.
In conclusion, maintaining a brick chimney offers several tangible benefits, including improved heating system efficiency, enhanced protection for your home, reduced chimney fire risk, and prolonged masonry life. Regular inspections and maintenance are essential to ensure these advantages are realized.
Preventative Maintenance
Annual Chimney Inspection
One of the cornerstones of chimney maintenance is an annual inspection by a qualified chimney sweep. These professionals can identify potential issues such as leaks, cracks, or mortar damage and address them promptly, preventing more extensive damage. Annual inspections also include chimney cleanings, crucial for removing creosote buildup that can lead to chimney fires.
Exterior Inspection
Regularly inspect the exterior of the chimney for visible signs of damage, such as cracks or crumbling bricks. These may indicate structural problems that require the expertise of a qualified contractor. Also, check the condition of the chimney cap or cover to ensure it keeps animals and debris out.
Interior Inspection
Routine checks inside the chimney are vital. Have someone examine the interior for water damage, signs of animal intrusion, and blockages. If any of these issues are detected, engage a professional chimney sweep to address them promptly.
Clear Surrounding Hazards
Ensure the area around the chimney is free of potential fire hazards. Keep plants, wood, and other flammable materials at least three feet away from the chimney.
By following these preventative maintenance tips, you can keep your brick chimney in peak condition, reducing the risk of costly repairs and ensuring maximum efficiency.
Cleaning the Chimney
Inspect for Damage
Begin the cleaning process by inspecting the chimney for damage or cracks. Regular inspections, especially after strong storms, help identify any issues early on.
Prepare for Cleaning
Before cleaning, protect your surroundings by covering furniture, rugs, and other items near the chimney to prevent dirt and debris from settling on them. Set up ladders or scaffolding to access the chimney’s top and gather the necessary cleaning tools. Don’t forget to take safety precautions to protect yourself during the process.
Manual Cleaning
While various cleaning products are available, manual cleaning is often the most effective method. Use a brush to scrub the chimney from top to bottom, ensuring you reach all crevices with a small or wire brush. After cleaning the exterior, vacuum the interior using a specialized shop vac or suitable vacuum to remove any remaining debris and creosote.
Post-Cleaning Inspection
After cleaning, inspect the chimney to ensure it’s still in good condition. Look for loose bricks or signs of damage and address them promptly to maintain safety and efficiency.
Regularly cleaning your brick chimney is essential for optimal efficiency and preventing potential damage or fires. Proper inspection and safety measures are crucial for a successful and safe cleaning process.
Repointing the Brickwork
Preparation
Before repointing the brickwork, take steps to protect the surrounding area. Cover it with plastic sheeting or drop cloths secured with tape, and clear away any debris and vegetation near the chimney.
Removing Old Mortar
To prepare for repointing, remove the old mortar between the bricks. You can do this manually using a cold chisel and hammer or a power tool like a rotary hammer or demolition hammer. Ensure safety precautions, such as wearing safety glasses and a dust mask, if using power tools.
Mixing and Applying New Mortar
Mix new mortar to a paste-like consistency, similar to peanut butter. Apply it to the joints using a trowel, ensuring a secure bond between the bricks. Allow the mortar to cure for 24-48 hours before further maintenance.
Sealing
To prevent moisture and other elements from seeping into the brickwork, seal the brickwork and mortar joints with a high-quality masonry sealer.
Repointing the brickwork is vital for maintaining chimney efficiency and structural integrity. Following these steps ensures safe and correct repointing, extending the chimney’s life.
Inspecting the Flue Liner
Understanding the Flue Liner
Regularly inspecting the flue liner is crucial for maintaining a brick chimney. The flue liner ensures the safe passage of smoke and combustion byproducts out of the home, preventing health risks and safety hazards.
Checking for Damage
Inspect the condition of the flue liner, looking for cracks, holes, or deterioration. Address any issues immediately to maintain the chimney’s structural integrity and prevent air leakage.
Determining Flue Size
Ensure the flue’s size matches your fireplace’s fuel type. For a wood fireplace, the flue should be at least 8 inches in diameter. Proper sizing prevents slow smoke movement and minimizes the risk of smoke entering your home.
Cleaning
Regularly clean the flue to remove debris, soot, and other deposits. You can use a chimney flue brush for this purpose or hire a professional chimney sweep for a thorough cleaning.
Inspecting Mortar Joints
Check mortar joints for cracks or crumbling. Ensure they are in good condition to maintain chimney safety and efficiency.
Chimney Cap
Inspect the chimney cap to ensure it’s in good condition and securely in place. A functional cap prevents debris and elements from entering the chimney and helps prevent creosote buildup.
Inspecting the flue liner is essential for chimney safety and efficiency. Regular checks and cleaning ensure proper functionality and help prevent costly repairs.
Repairing and Replacing Damaged Components
Identifying Damage
Inspect the chimney and identify damaged components. Cracked mortar joints, loose or missing bricks, or signs of deterioration should all be addressed promptly.
Repairing Minor Damage
For minor damage, clean the area, mix mortar to a paste consistency, and apply it to the damaged joint
. Ensure a secure bond and let the mortar dry completely.
Replacing Bricks and Mortar
For substantial damage or damage on the chimney’s interior, consider hiring a professional masonry contractor. They can replace bricks to match the existing chimney, ensuring proper installation and sealing for optimal efficiency.
Waterproof Sealant
Protect exposed brickwork with a waterproof sealant to shield against moisture, dirt, and other damaging agents.
Maintaining a brick chimney requires regular inspection and prompt repair or replacement of damaged components. These steps extend the chimney’s life and ensure optimal performance.
Replacing Damaged Mortar Joints
Inspecting for Damage
Regularly inspect the chimney for damaged mortar joints. Look for erosion, damage from animals or pests, and signs of wear and tear.
Removing Old Mortar
Carefully remove old mortar using a cold chisel and hammer. Be cautious not to damage surrounding bricks during this process.
Cleaning and Preparing
Clean the area, removing loose debris. Mix new mortar to a paste-like consistency and apply it to the joints. Ensure a secure bond between the bricks.
Sealing
Seal the brickwork and mortar joints with a high-quality masonry sealer to prevent moisture and contaminants from damaging the chimney.
Replacing damaged mortar joints is a vital part of chimney maintenance to maintain efficiency and structural integrity. Regular inspection and prompt repairs are essential.
Repairing or Replacing Damaged Bricks
Identifying Brick Damage
Inspect the chimney for damaged bricks. Cracks, discoloration, and bulging indicate problems that can affect the chimney’s structural integrity.
Repairing Bricks
For minor damage, clean the area, mix mortar, and apply it to the damaged brick’s edges. Ensure a secure bond and allow the mortar to dry.
Replacing Bricks
For major damage, carefully chisel away the damaged brick and prepare the area. Replace it with a new brick, securing it with mortar and ensuring it’s level and secure.
Applying Waterproof Sealant
Protect exposed brickwork with a waterproof sealant to safeguard against moisture and contaminants.
Maintaining your brick chimney’s bricks is crucial for structural integrity. Identify and repair damaged bricks promptly to ensure proper chimney function.
Installing a Rain Cap or Top Seal Damper
Protecting Your Chimney
Installing a rain cap or top seal damper is essential to protect your chimney from the elements, pests, and blockages. These components also prevent the loss of warm air and cold drafts from entering your home.
Installation Steps
- Remove existing hardware from the chimney crown.
- Install the rain cap or top seal damper in its place, securing it properly.
- Ensure a secure seal around the edge to prevent leakage.
- Apply silicone sealant for added protection.
- Test the damper to ensure proper functionality and sealing.
Installing a rain cap or top seal damper is a critical part of chimney maintenance. When done correctly, it safeguards the chimney and improves airflow, enhancing your home’s comfort and safety.
In conclusion, a brick chimney requires regular maintenance to ensure its safety, efficiency, and longevity. Each component should be inspected, cleaned, and repaired as needed to prevent costly repairs and maintain optimal performance. By following these comprehensive guidelines, you can enjoy the benefits of a well-maintained brick chimney for years to come.